I have been promising an updated, easier to follow, tutorial on making a grid border template and I hope this will provide a better step by step, visual learning experience for everyone who has tried to, or wanted to but just couldn't, make grid border templates to work from.
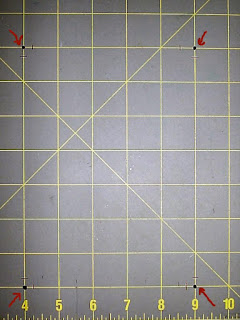
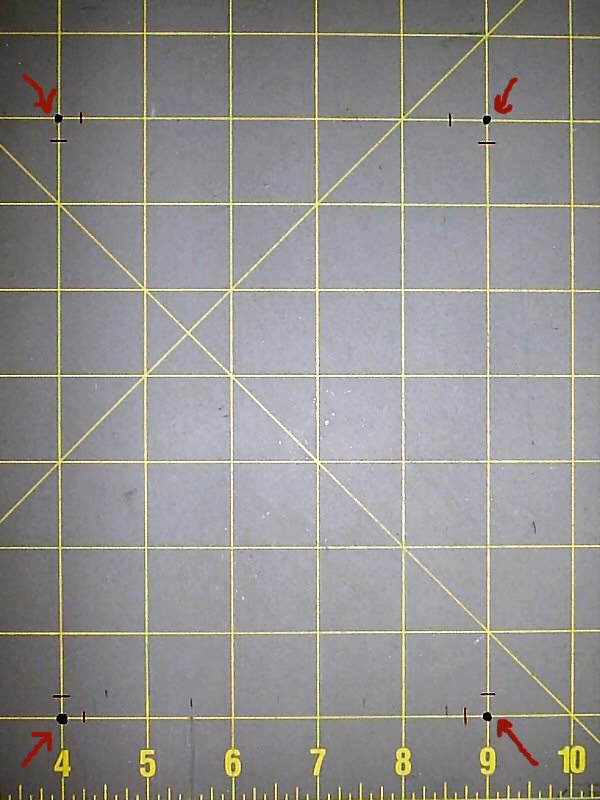
The very first thing that will make life much easier is this: I do all my work on my Steadtler 11X17" Cutting Mat which is permanently mounted on my parching table work area. However, any cutting mat you prefer is quite suitable. Now, because I make all my parchment greeting cards the same size, which is 5 inch X 7 inch (US Standard Measurements), I have marked off, with permanent felt tip markers, an area on my cutting mat to represent those measurements.


 As you can see, I have now worked my way across the top and down the left side of my template with the embossing of the pattern I chose. Now you can easily simply repeat the right side and bottom of your template directly following what you have already done on the opposite sides......or you can continue to work from the printed pattern.
The next step is to also mark off the actual size I want all of my parchment border templates to be....and that is 4.5 inch X 6.5 inch to accommodate the 5 inch X 7 inch completed card.
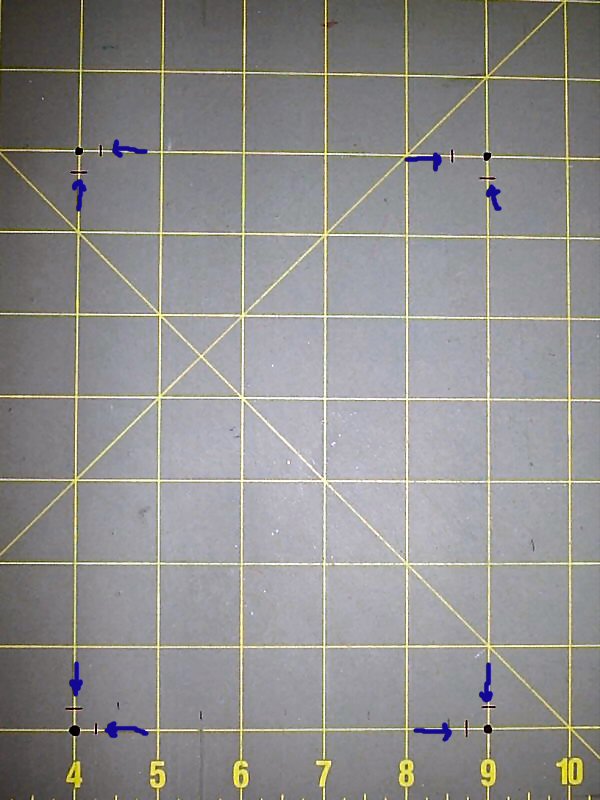
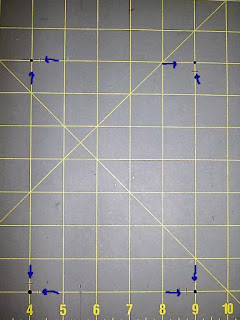
I realize the images may be a bit difficult to see, but I have measured IN 1/4 inch from the outside dimensions on all four sides and put new marks on my cutting board which now equal the 4.5 inches X 6.5 inches.
You now have all the measurements you need to work with, when making your grid templates, permanently established right there on your cutting mat. Now, we are ready to move on to the next step.
When making grid templates, it is my very strong recommendation you not use parchment paper. It's not cost effective.....templates are not going to be kept as keepsakes....and you do not need to use quality paper for your templates. After many, many uses from each template, they then are remade onto a new piece of 40# HEAVY WEIGHT VELLUM from the old template, which is then disposed of. These sheets of VELLUM are 8.5 inches X 11 inches and are sold in lots of 10 sheets for a very reasonable price.....and International shipping fees are very reasonable as well.
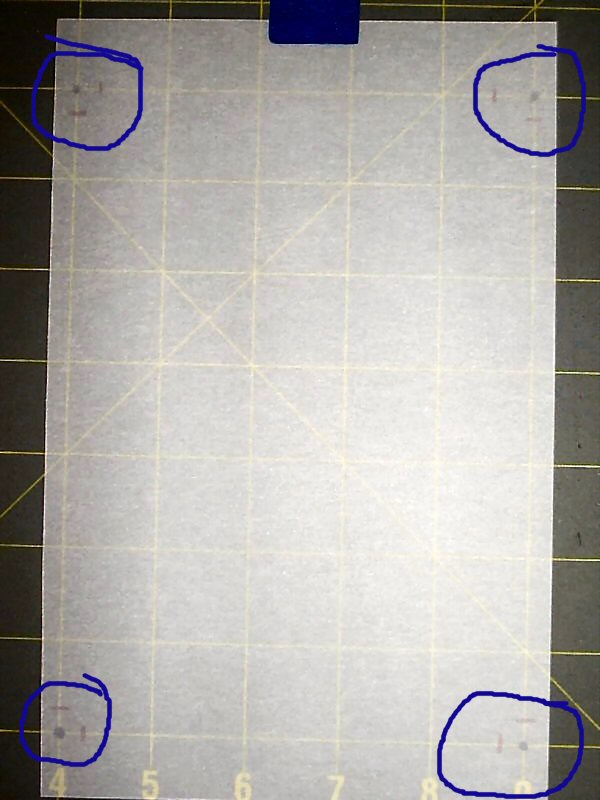
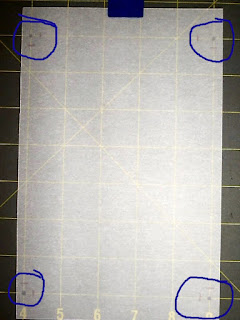
Next, cut a sheet of VELLUM in half. This will give you two equal sheets of 5.5 inches X 8.5 inches VELLUM. Gently rub BOTH sides of the sheet with a strip of tumble dryer sheet. (I always cut my dryer sheets in several strips....again, very cost effective!!) I fold the dryer sheet in half......cut it. Fold in half again....cut it. I then have four strips from one dryer sheet which can be used many times over for wiping down my parchment paper prior to beginning any work. Okay, now it's time to mount your piece of VELLUM to your cutting mat OVER the marks you have made and evenly situate the VELLUM over those marks and secure to the mat with low tack tape.
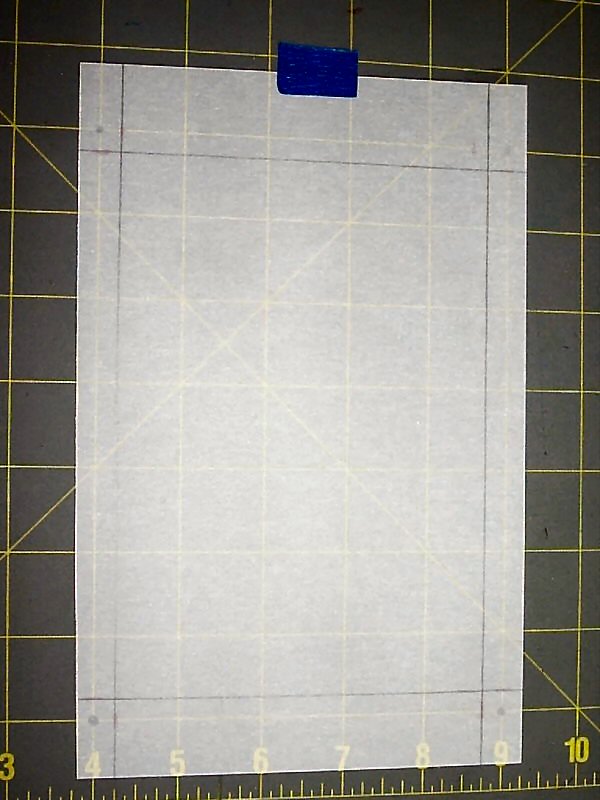
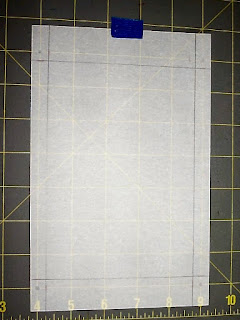
Using a 12 inch ruler, you will now make your border lines (with pencil, to be erased later) following the INSIDE marks you have made on the mat as shown above. When this is completed, remove the VELLUM from the mat and set aside.
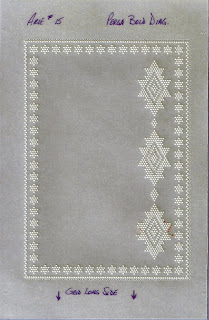
Next is picking out a grid border pattern you like and will be using in your work more than once. I have chosen Arie v.d. Linden's pattern #15 (which I have permission to use) and I will have to alter it to suit the measurements I require for my work. On regular printer paper, print out the grid pattern in a size that is easily read and also print the sample card of the pattern for your own visual reference as you work. Set the pattern and the sample aside.
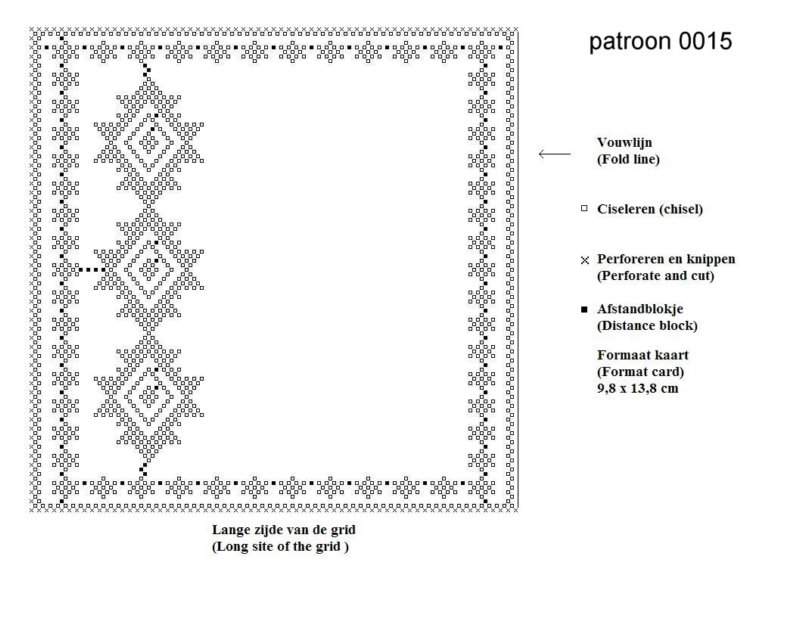
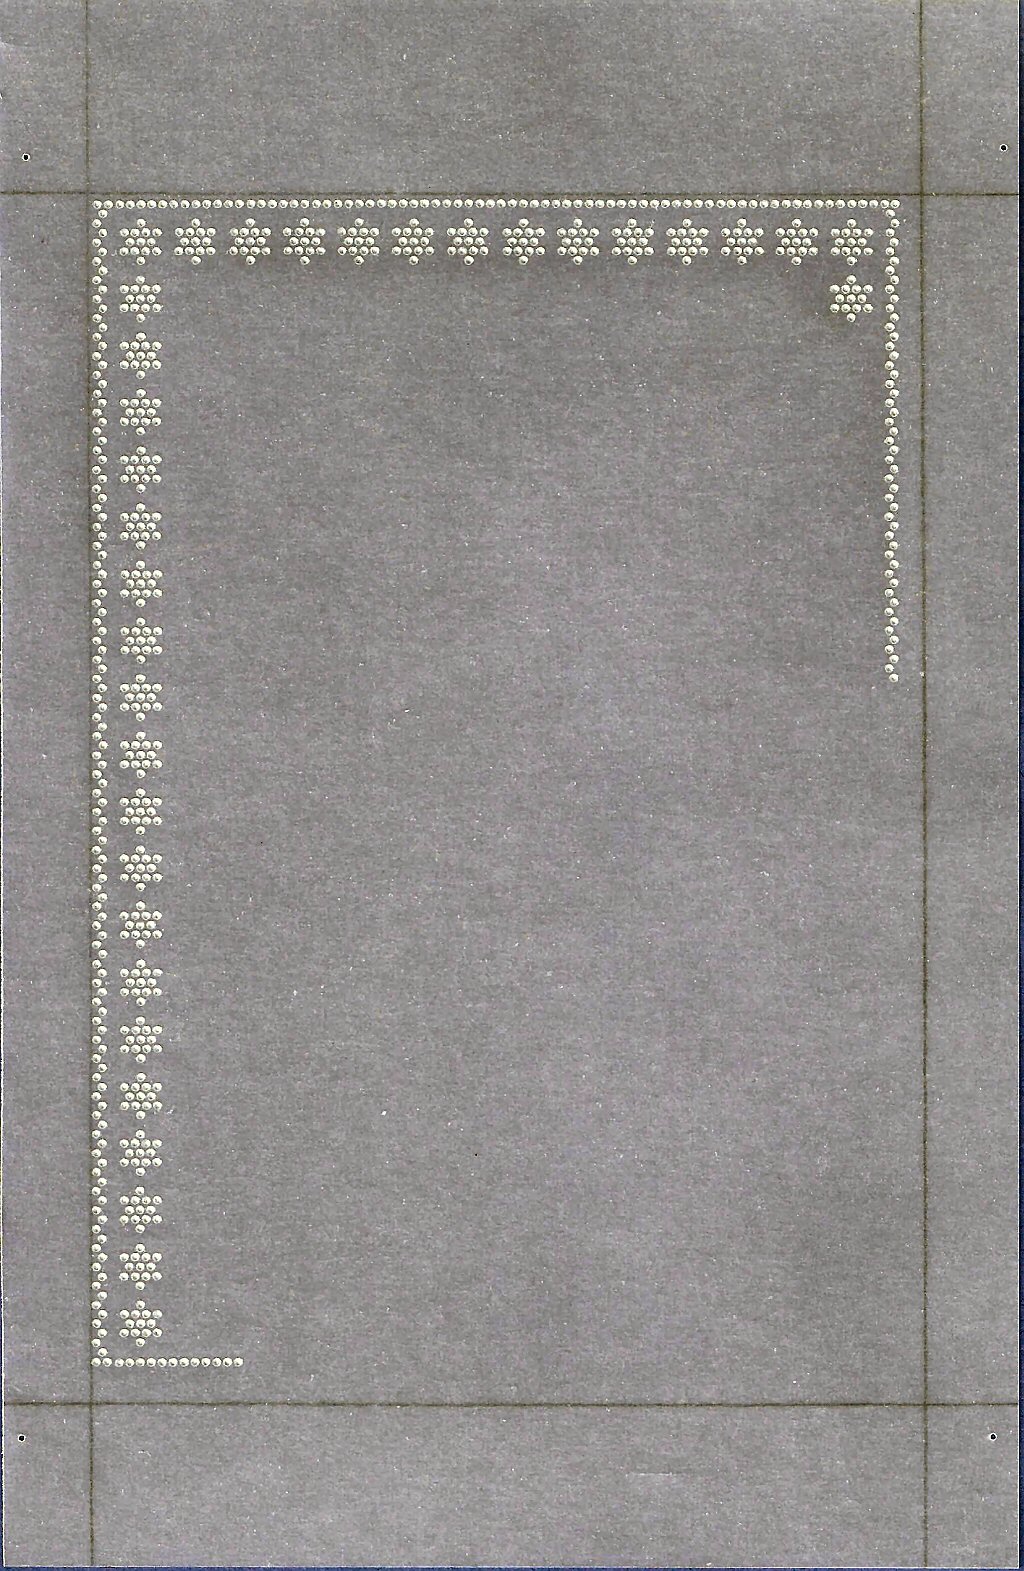
We are now ready to begin making a grid TEMPLATE!! For this tutorial we will be using a Pergamano Bold Diagonal grid. The very first thing you MUST do is read, on the pattern, which way your VELLUM is to be placed ON the proper grid!!! In this case we are to place the bottom edge of the VELLUM on the LONG side of the grid. Making sure your paper is aligned straight on the grid, secure it to the grid with short shank mapping pins. You may also use low tack tape, however it does not adhere well to the Perga grids, thus I recommend the mapping pins. When making any grid template ALWAYS begin with the embossing and ALWAYS begin in the top LEFT corner. Following the printed pattern begin your embossing INSIDE (as shown below) the pencil border lines. Continue working across the TOP to a short distance from the right corner and stop. Now return to the LEFT corner and work down that side to a short distance from the bottom left corner. You want to leave enough room at the top right and bottom left corners to make any adjustments required in the pattern for the SIZE you need your template to be.
**VERY IMPORTANT** Please have a colored fine tip felt tip marker at hand and a white gel pen. As you are embossing your template, following the printed pattern, you WILL make errors.....we all do.....even ME!! Your template IS where you WANT to make your errors so you do not make them on your actual parchment paper projects. As you make an error, take your colored fine tip marker and GENTLY mark that embossed dot. Then proceed on with your embossing. Now, most times the error mark you just made will become a 'correct' emboss for another row of the pattern so you now have to 'undo' the error you marked earlier. Take your white gel pen and GENTLY dab the embossed error with that (to make it as close to white as possible) and your ready to proceed again. It sounds like a lot of work, I know, but in the end you'll see how it all works out :))

This particular grid border pattern also has grid work inside the border, however, because I have re-sized the original pattern to a size I need for my own work I have made ONLY the outside part of the pattern FIRST. Now, I will return to the printed pattern and continue on with the design inside the border and then finish up the remaining embossing for the border edges.
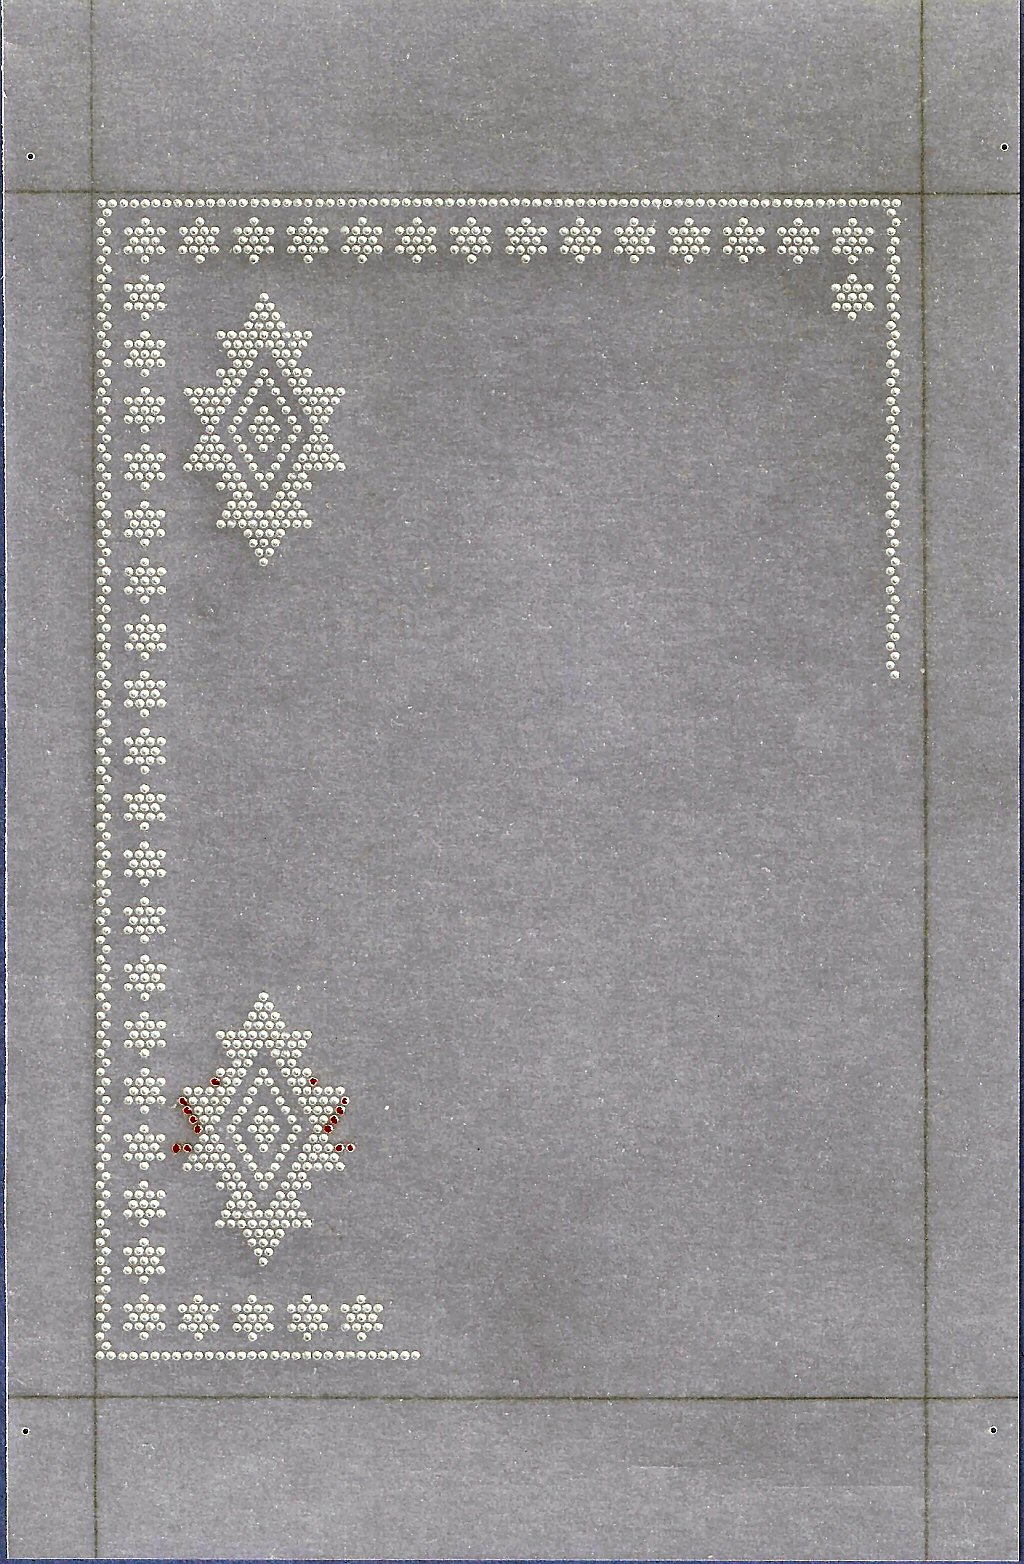
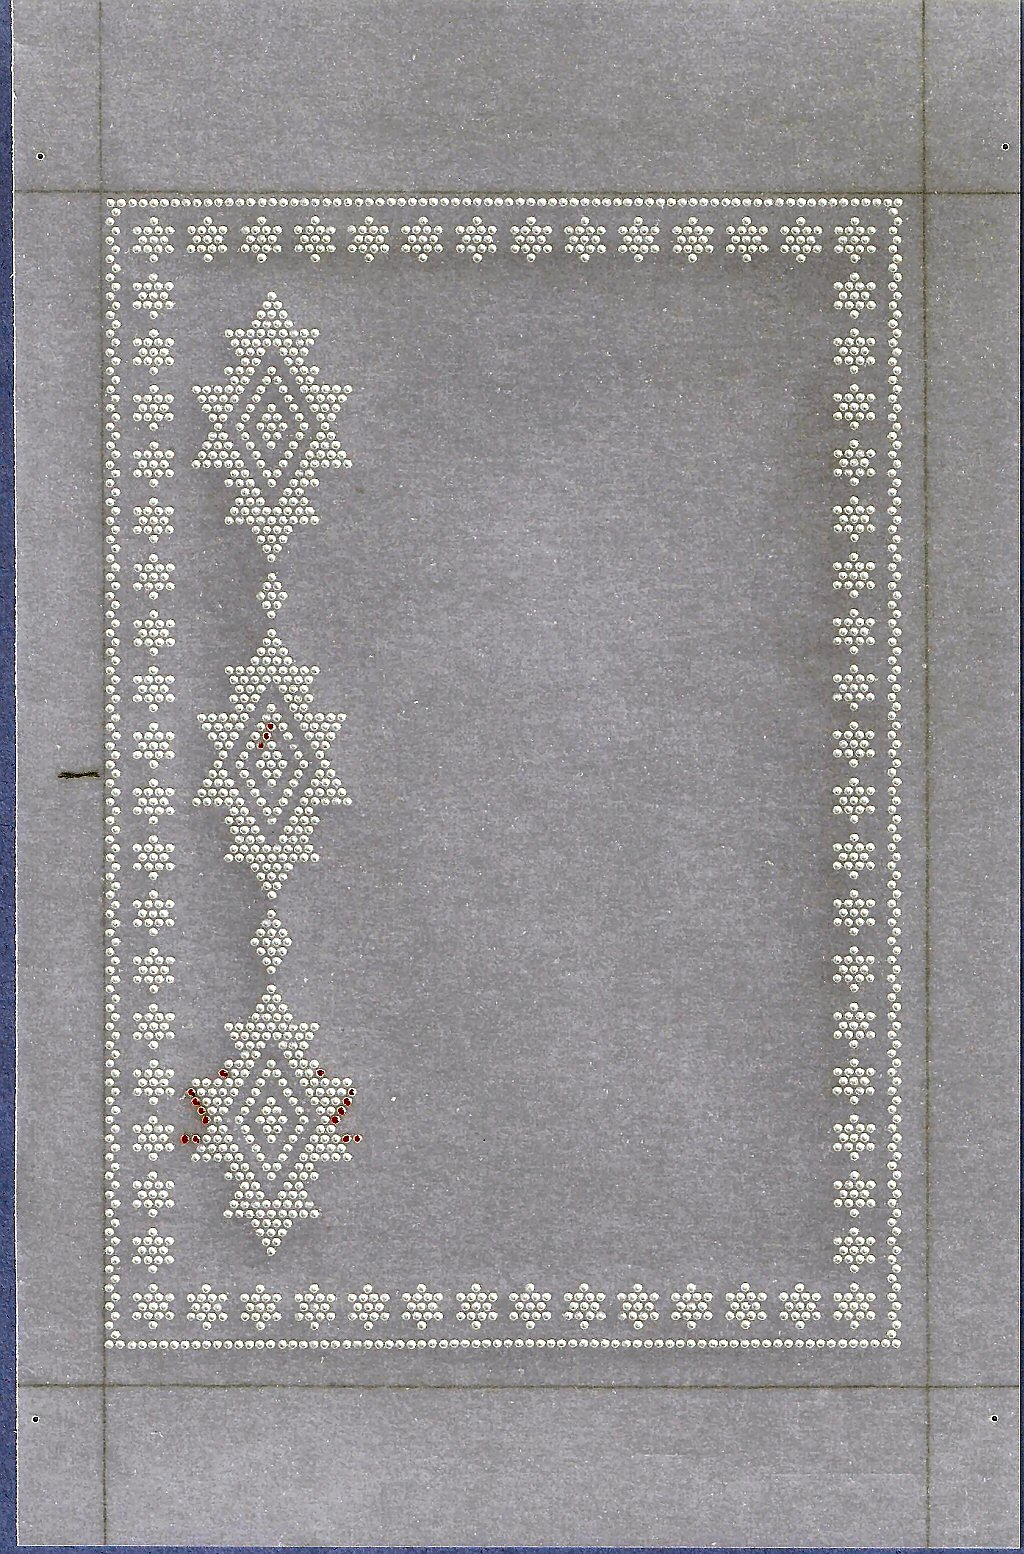
I know I'm repeating myself, however, my template is a different size than the original pattern, sooooooo the designs inside the border are NOT going to work out as they are on the printed pattern!! I have had to make the top and bottom embossed designs exactly as the printed pattern instructs. The center design now has to be centered (as closely as possible) between the two designs already embossed. There are other options you could use, however, we'll concentrate on following the original printed pattern as much as we can. Counting the border designs on the left side, find the center design and make a a line with a pencil (to be erased later) in to where it will be centered between the two existing designs. Next, beginning in the CENTER of the third embossed design (and aligning it so it coincides with the other two embossed designs) continue to make the third design (from the center out as shown below).
 Remember at the beginning of this tutorial I mentioned the importance of marking errors as we work? As you can now see in the image above, "I" make boo-boos too!!! Mine are always marked in RED.....a clear warning sign when I use my templates that there is something I've done there that is very wrong.
Okay, now we have the three embossed designs placed inside the border and you can either leave them 'unattached' to each other or attach them as the printed pattern shows. Don't be alarmed if when you attach them, as I chose to do, they may be one, or two, grid holes difference. If you look VERY close to my template, you will see my diamond shape between the middle and bottom embossed design is a four dot diamond and the one between the top and middle embossed design is only a three dot diamond. It's okay folks....nothing HAS to be absolutely perfect!!!
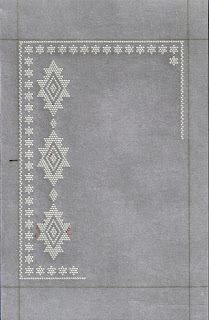
Now, finish up the remainder of the border embossing.
 Double check all of your embossing. Make sure you haven't missed any spots!!
Now, remove the template from the grid. ERASE ALL THE PENCIL MARKS. Flip the template over so that it's right side is facing you. Place the template back on the grid being VERY careful to align all your embossing with corresponding grid holes....while at the same time make sure the template is aligned straight on the grid.....with the BOTTOM edge of the template placed on the LONG side of the grid. Secure the template to the grid as before.
Now, you are ready to make all the perforations as the printed pattern indicates.
 It is not mandatory, but I always perforate around the outside of the border while it is on the grid. You will find this will help tremendously later on when you actually use your template to make a parchment project. **Explanation to follow later**
So, here we are at the last step in the process.....and it is the most important step. Refer to the image above and write (in ink or marker) the name of the pattern/the grid it's made on and VERY IMPORTANT.....the direction the template goes back on the grid when you want to use it for a project.
*****************************************************************

Okay, now we have the three embossed designs placed inside the border and you can either leave them 'unattached' to each other or attach them as the printed pattern shows. Don't be alarmed if when you attach them, as I chose to do, they may be one, or two, grid holes difference. If you look VERY close to my template, you will see my diamond shape between the middle and bottom embossed design is a four dot diamond and the one between the top and middle embossed design is only a three dot diamond. It's okay folks....nothing HAS to be absolutely perfect!!!
Now, finish up the remainder of the border embossing.
Now, remove the template from the grid. ERASE ALL THE PENCIL MARKS. Flip the template over so that it's right side is facing you. Place the template back on the grid being VERY careful to align all your embossing with corresponding grid holes....while at the same time make sure the template is aligned straight on the grid.....with the BOTTOM edge of the template placed on the LONG side of the grid. Secure the template to the grid as before.
Now, you are ready to make all the perforations as the printed pattern indicates.

So, here we are at the last step in the process.....and it is the most important step. Refer to the image above and write (in ink or marker) the name of the pattern/the grid it's made on and VERY IMPORTANT.....the direction the template goes back on the grid when you want to use it for a project.
*****************************************************************
Finally, the explanation on why you should also perforate around the outside edge of the border on the template. When you are ready to use your grid border TEMPLATE on a parchment craft project you will place the template FACE UP on the grid, in the direction your notes on the template state, and you will ALWAYS begin with PERFORATING. Place your parchment paper OVER the template and arrange it according to how you want it to surround your image on the parchment paper. Secure BOTH the template and parchment paper with short shank mapping pins and proceed with SHALLOW perforating according to the template beneath the parchment paper. When all perforating is complete......remove the parchment paper AND the template from the grid. Set the TEMPLATE aside, but close by. Flip the parchment paper over (wrong side facing down) and place it back on the grid in the same direction is states on the pattern. Begin aligning the perforated holes accordingly on the grid and make sure everything is also aligned straight. Now, move the TEMPLATE close by, visually, as this now becomes your working pattern for all the embossing on your parchment craft project. Remember, any embossing you have marked as errors are not to be embossed on the real project and those you have corrected with your white gel pen, are!! When the embossing is completed, remove the parchment paper from the grid, flip it over to the right side, place it back on the grid (in the proper direction) and perforated DEEP, in ALL perforations, to complete your grid border. Remove the parchment craft project from the grid and finish the project in your preferred manner. Don't get discouraged.....all this takes practice, just like all other parchment craft techniques :))
I recommend you store your grid border TEMPLATES in the appropriate size zip bags OR greeting card sleeves. You can store many templates in one zip bag/sleeve and I recommend you mark them as "Perga Templates" and "PCA Templates". As you gather a good sized collection of templates, it much faster and easier to find what you're looking for if they are relatively organized and storing them in zip bags or sleeves also protects them and they will last a very long time and withstand lots of use.
Best wishes on your journey through this updated tutorial. Take it step by step.....and slowly.....and you will make it to the end!!! Maybe not the first time around, but with a wee bit of determination, you'll accomplish it :))


Wonderful tutorial, Vicky!!
ReplyDeleteI couldn't have done it better....LOL
Thank you for this very clear way of making a template.
I store my templates together with the printed pattern version with all the information on it,in a folder with plastic sheets, so I have them "complete".....
Hugs, Nelly
Thanks for your very kind comment, Nelly. I'm pleased to know you are taking good care of the templates you have made. You will enjoy using them for a very long time to come!!
ReplyDeleteVickie, you have made it so clear in how to make a template. I hope anyone who has seen your cards try this technique. Since you have taught me this technique I don't hesitate like I use to try gridwork...love it! Thank you for taking all your time and energy to help with this beautiful technique.
ReplyDeleteYou're most welcome, Martha!! I'm pleased you now find it enjoyable to make projects with grid borders...because you've learned how to make grid border templates to work from!!!
ReplyDelete